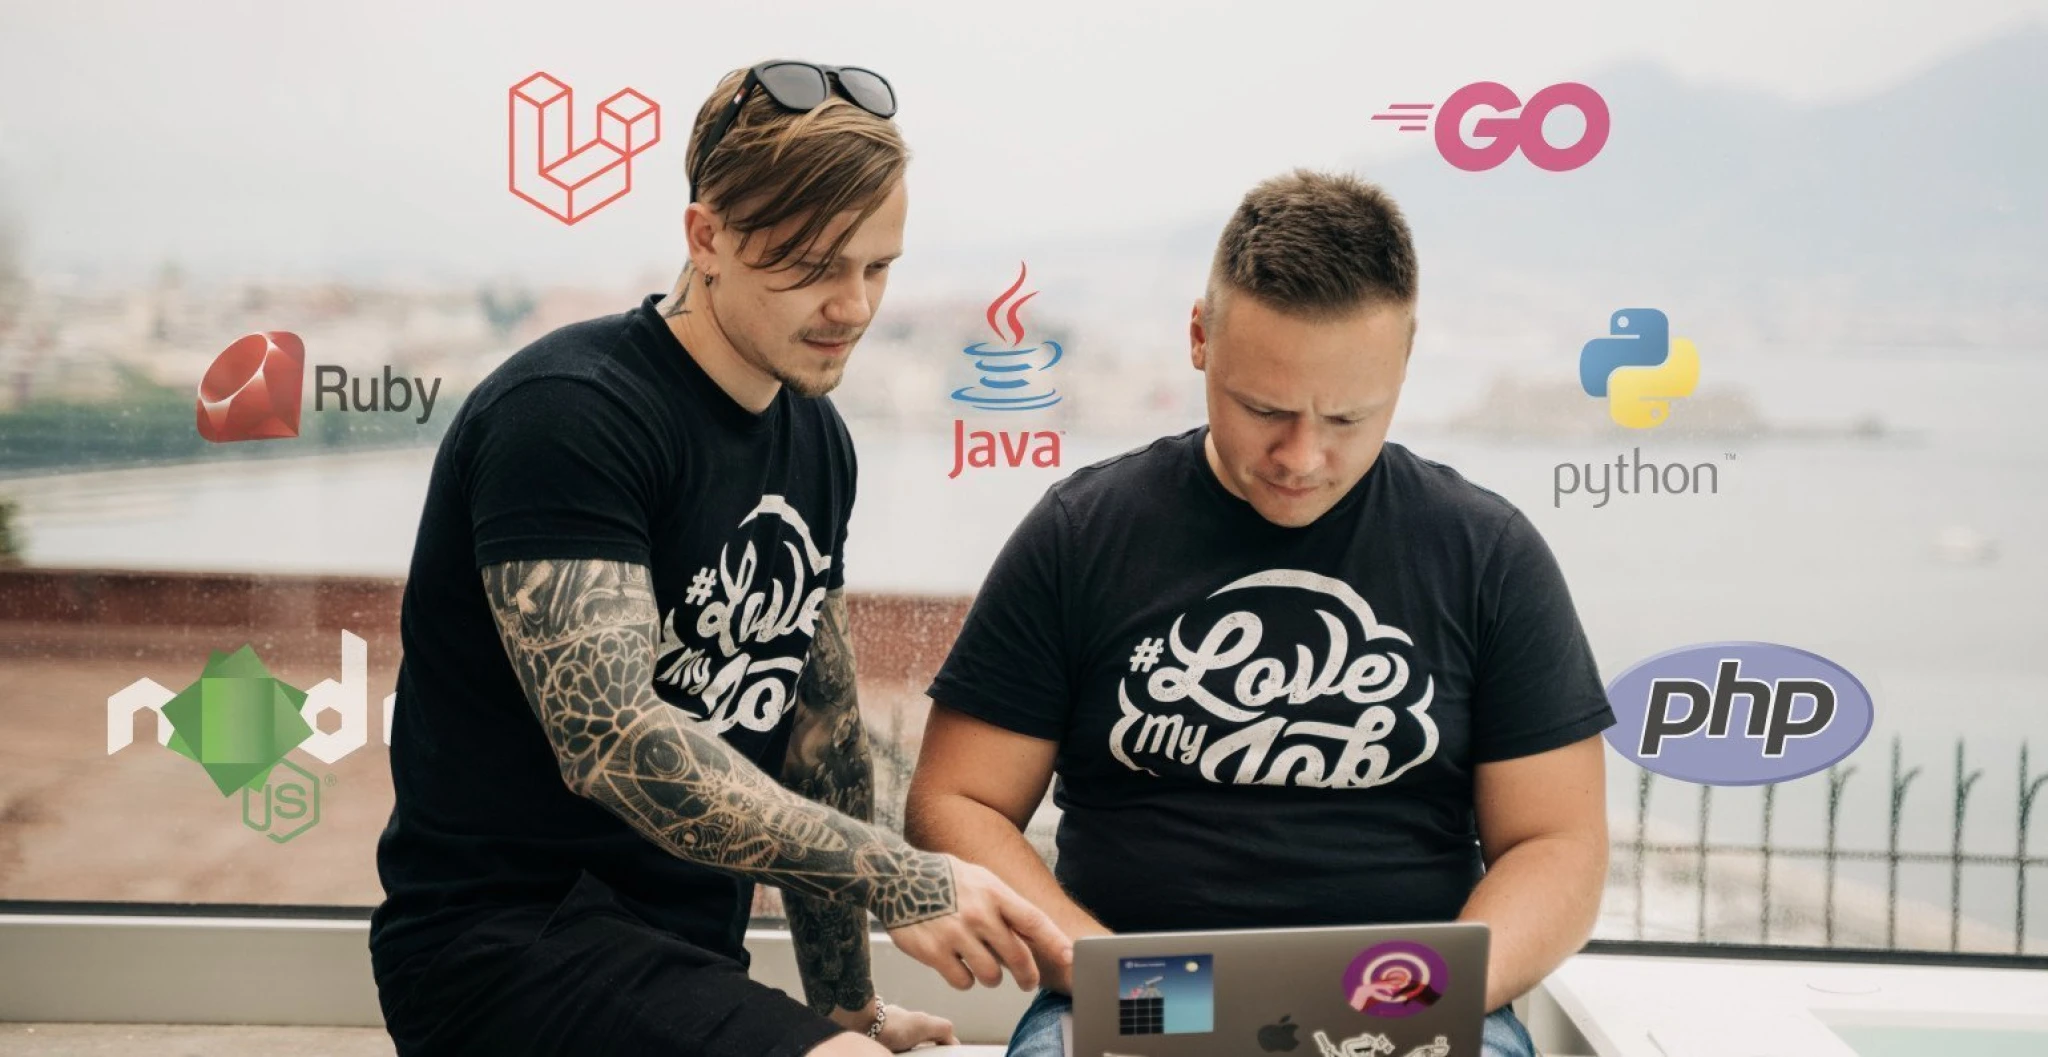
7 SDKs to send emails in your favorite programming language
A powerful email API enables you to integrate email sending in any app or website that you’re building. You can use the API to access commonly used endpoints such as sending emails with attachments, or dive into more advanced features like creating a webhook or an inbound route.
But it can sometimes feel like you’re reinventing the wheel when you call API endpoints using your preferred programming language. The good news is that software development kits (SDKs) can save you much coding time and effort by bundling pre-built components and documentation.
Read on to learn how you can leverage official SDKs from VhtLtd to reduce development time and get started with sample code to send emails and personalize them!
Integrate the email API in 3 steps
When it comes to sending transactional emails, like account notifications or order updates, you have a choice of using VhtLtd’s email API or SMTP. Using SMTP is the fastest and easiest option but it’s best left for legacy applications or Internet of Things (IoT) devices.
The email API is the most powerful option as you can call on just about every endpoint of the VhtLtd app from your project. Plus, you get advanced functionality like using email templates and personalization using variables—features that are not defined with the SMTP standard.
Before you dive into an SDK for your programming language, you’ll need to do some preliminary work first. Let’s add a sending domain and create an API token before covering each SDK in turn.
Step 1. Add a sending domain
To send emails with VhtLtd using your own domain, you first need to verify and authenticate it.
1. Navigate to Domains in the top navigation bar and click on Add domain.
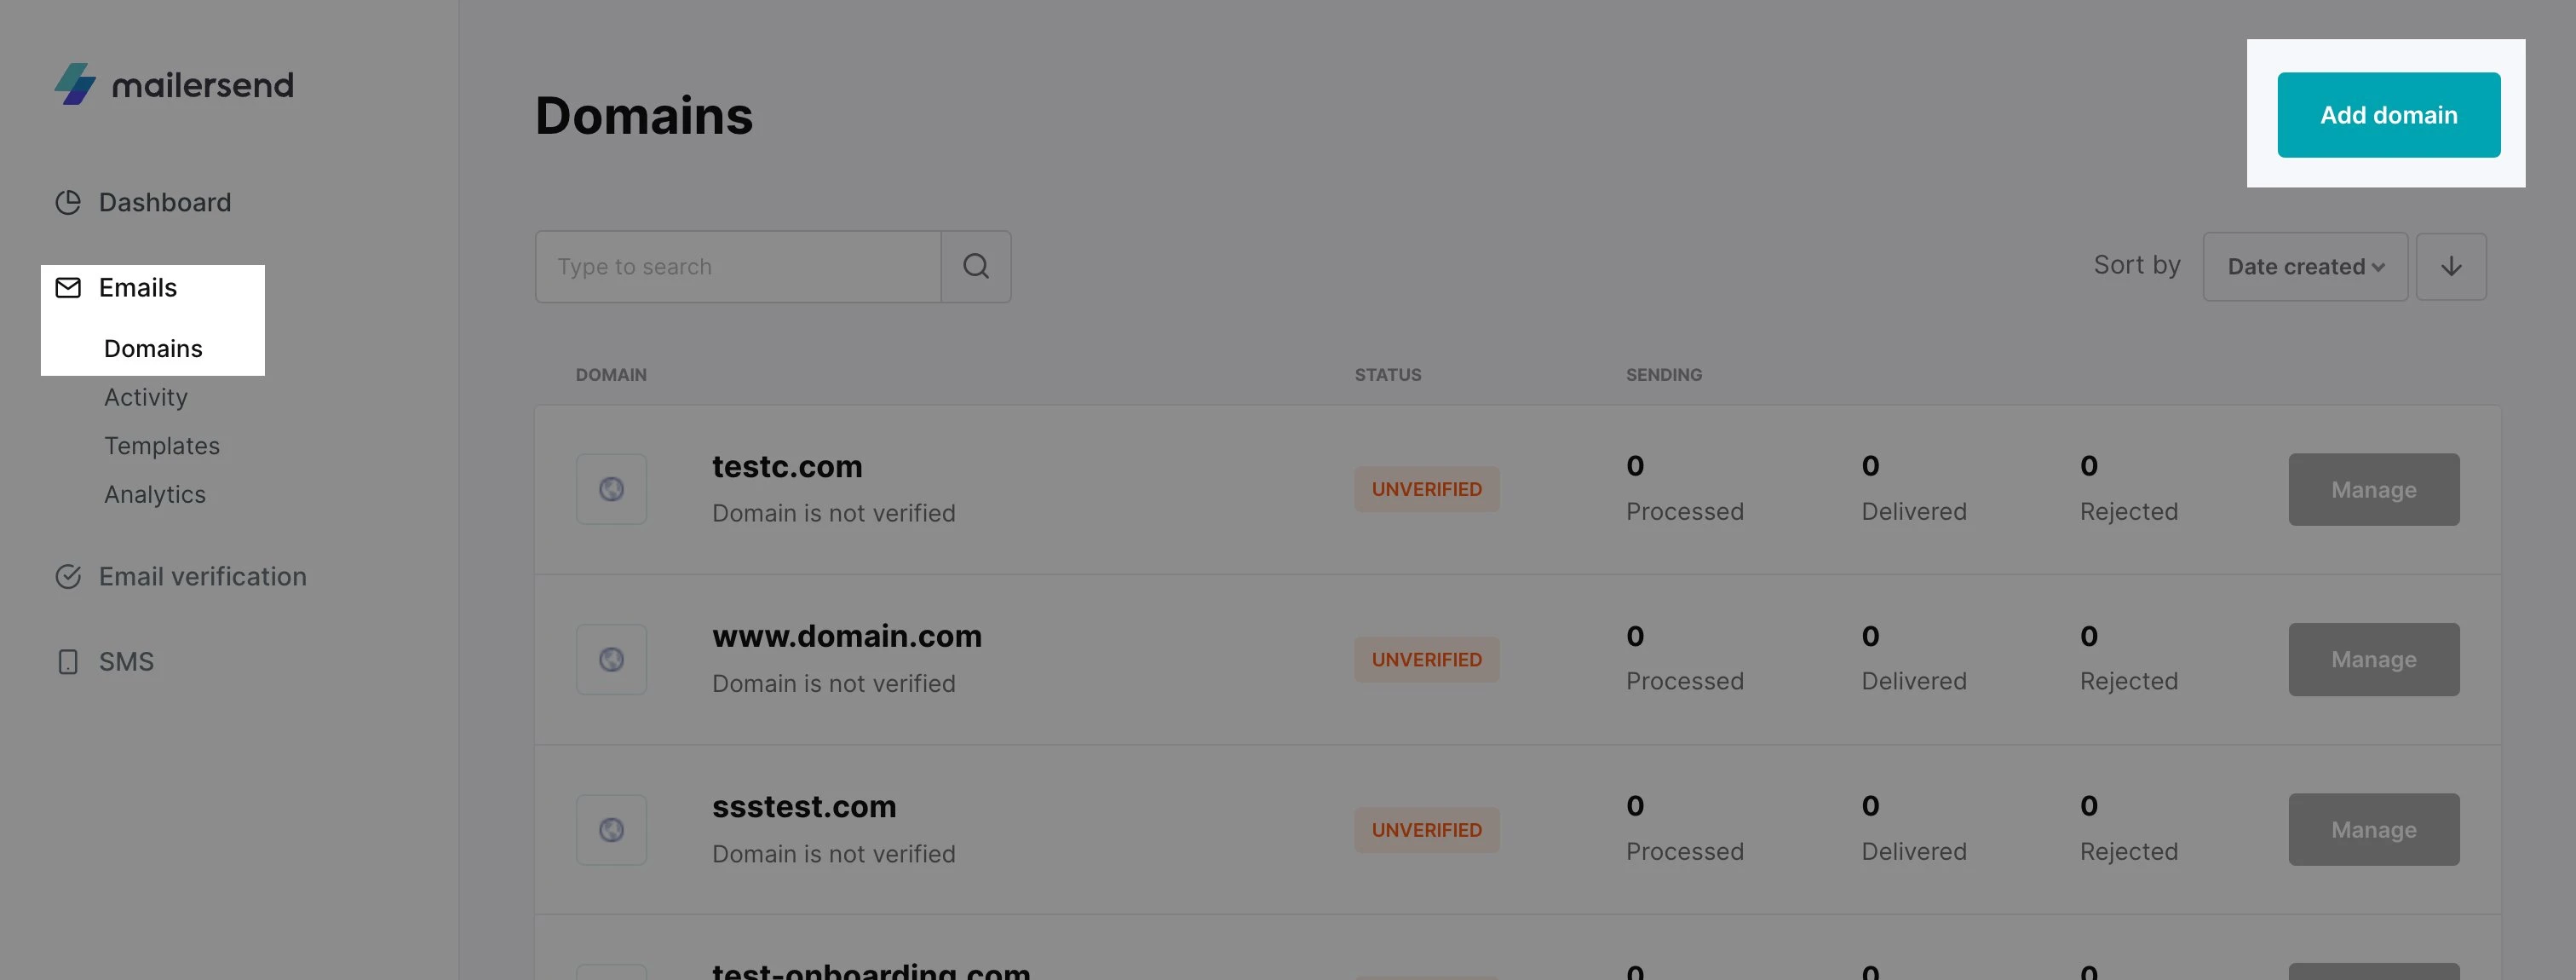
2. Enter your domain name and click Add domain again.
3. Next, you will see the DNS records to be added to the domain’s DNS page:
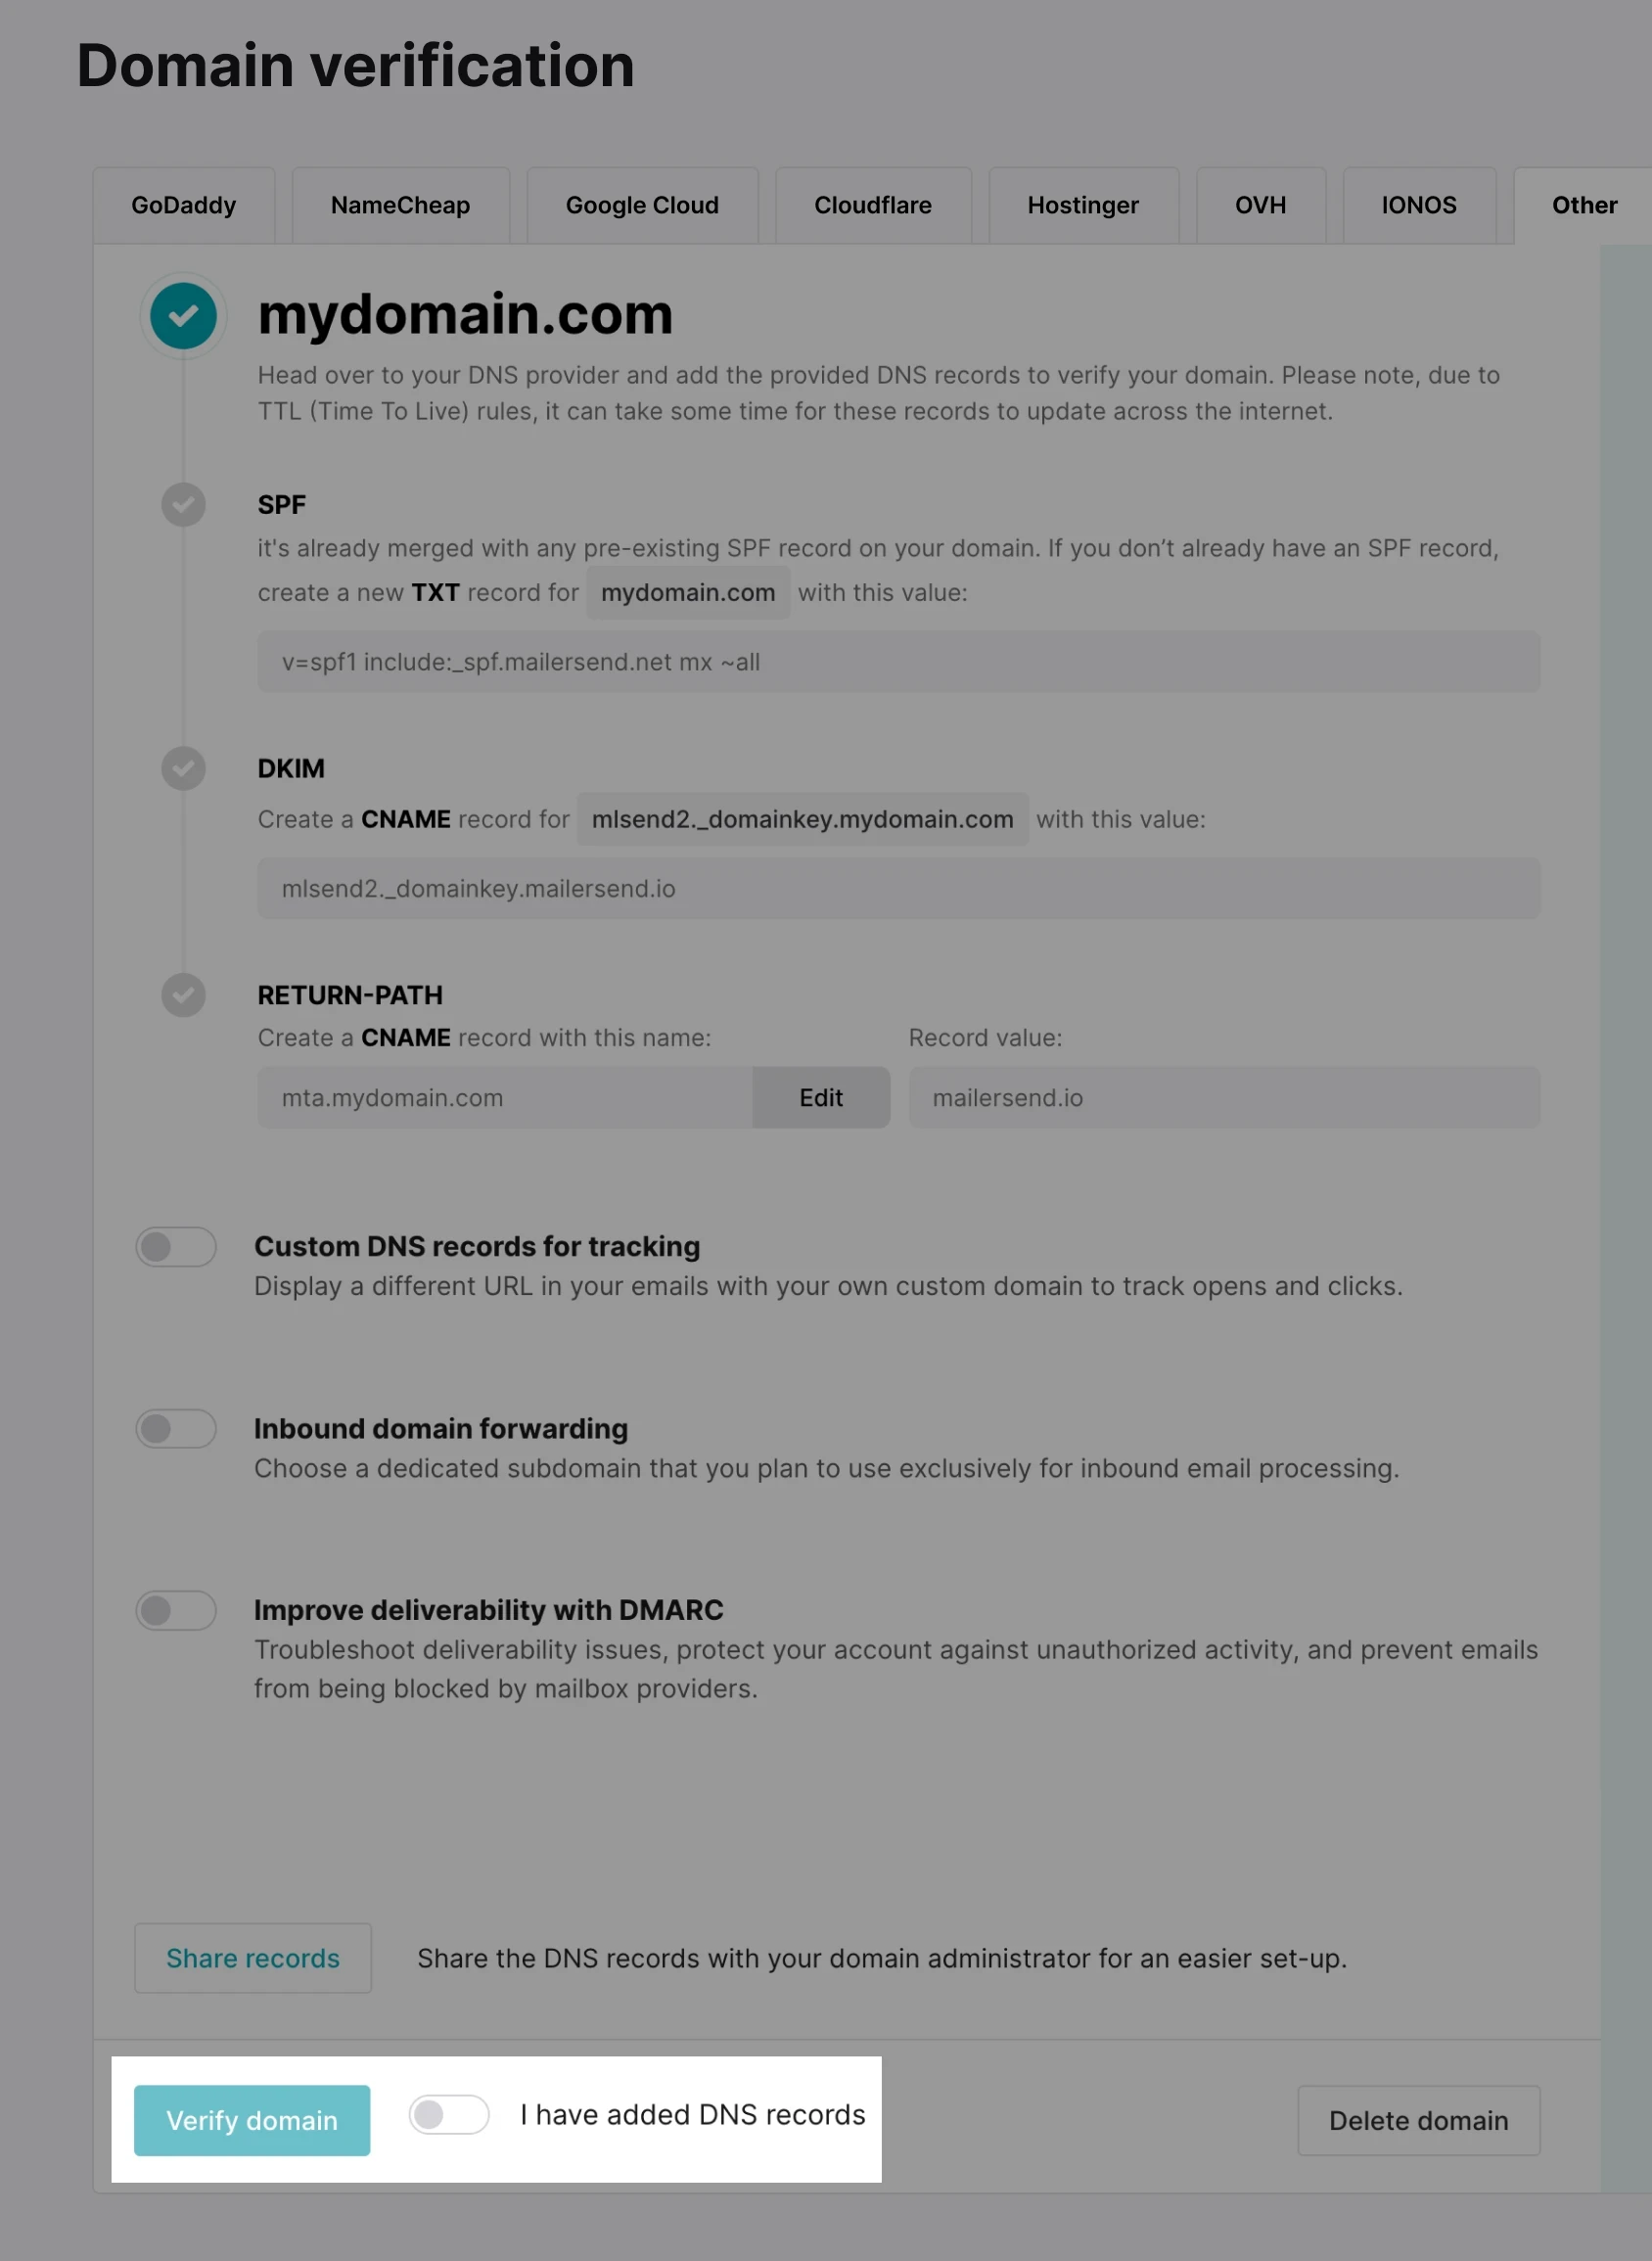
SPF: Sends the mail server IP validation.
DKIM: Like SPF, but uses cryptographic methods for validation.
CNAME for Return-Path: The address where bounces and other email feedback are sent to. It is specified by the Return-Path header in an email.
If you have a domain administrator, click Share records to email the DNS records so it can be done for you. You can then jump to step 5. Lucky you!
Otherwise, click on each field to copy it and go to the next step.
4. Log in to the sending domain’s DNS page on the hosting provider’s site and add the TXT and CNAME records that you have just copied.
If you're unsure how to do this, follow the instructions provided. VhtLtd will automatically identify your domain registrar and provide the correct steps.
5. After adding the records, toggle the option I have added the DNS records in VhtLtd and click Verify domain. It can take up to 24 hours for the records to propagate, but it usually takes a few minutes.
Congrats, you just added your first sending domain! 🎉
Step 2. Generate an API token
Next, you’ll need an API token to integrate VhtLtd’s email API into your apps.
1. Navigate to the Domains page and click on a domain.
2. Create an API token by clicking on Generate new token.
3. Enter a name for the token, choose its permission level, and then click Create token.
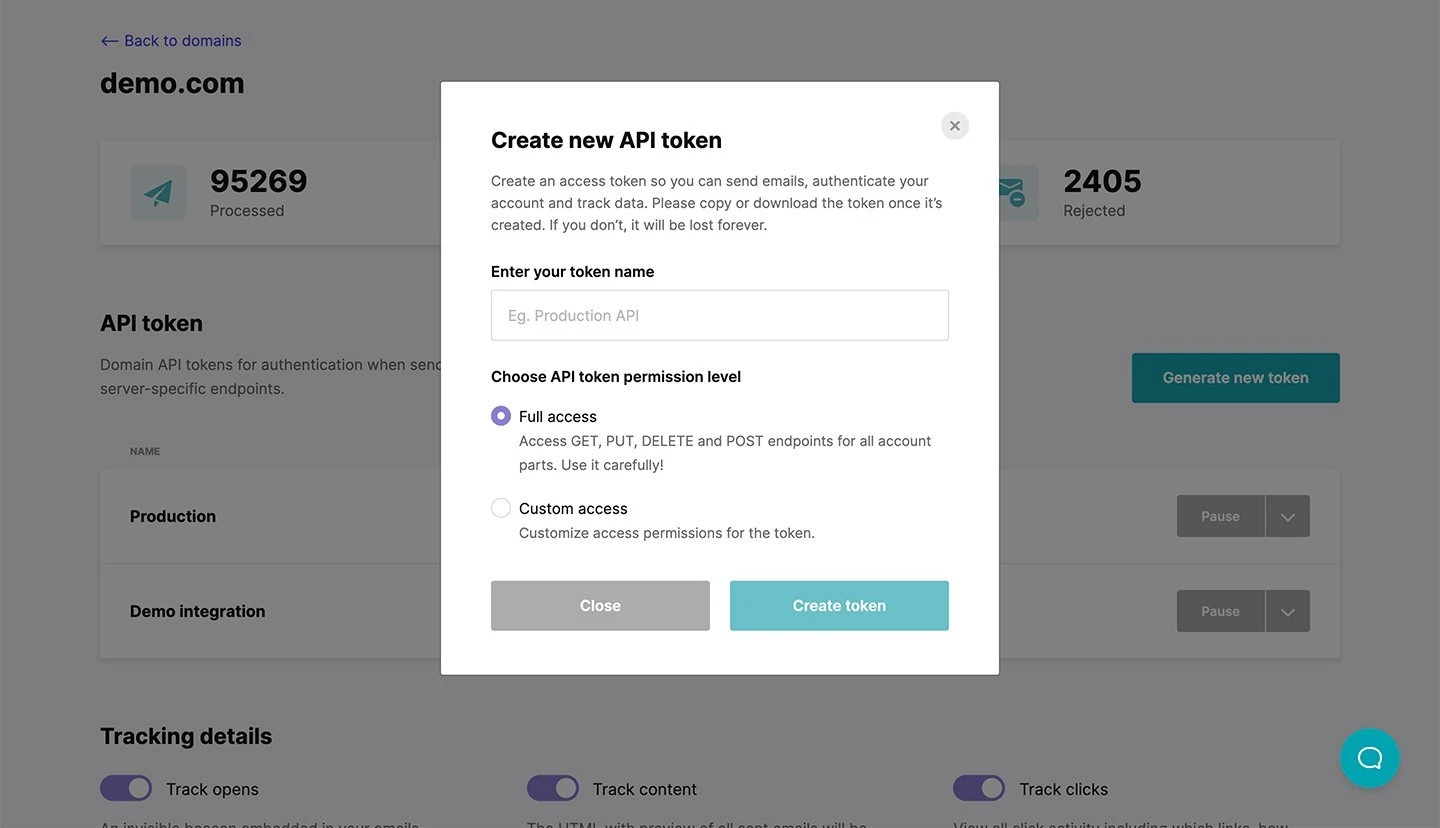
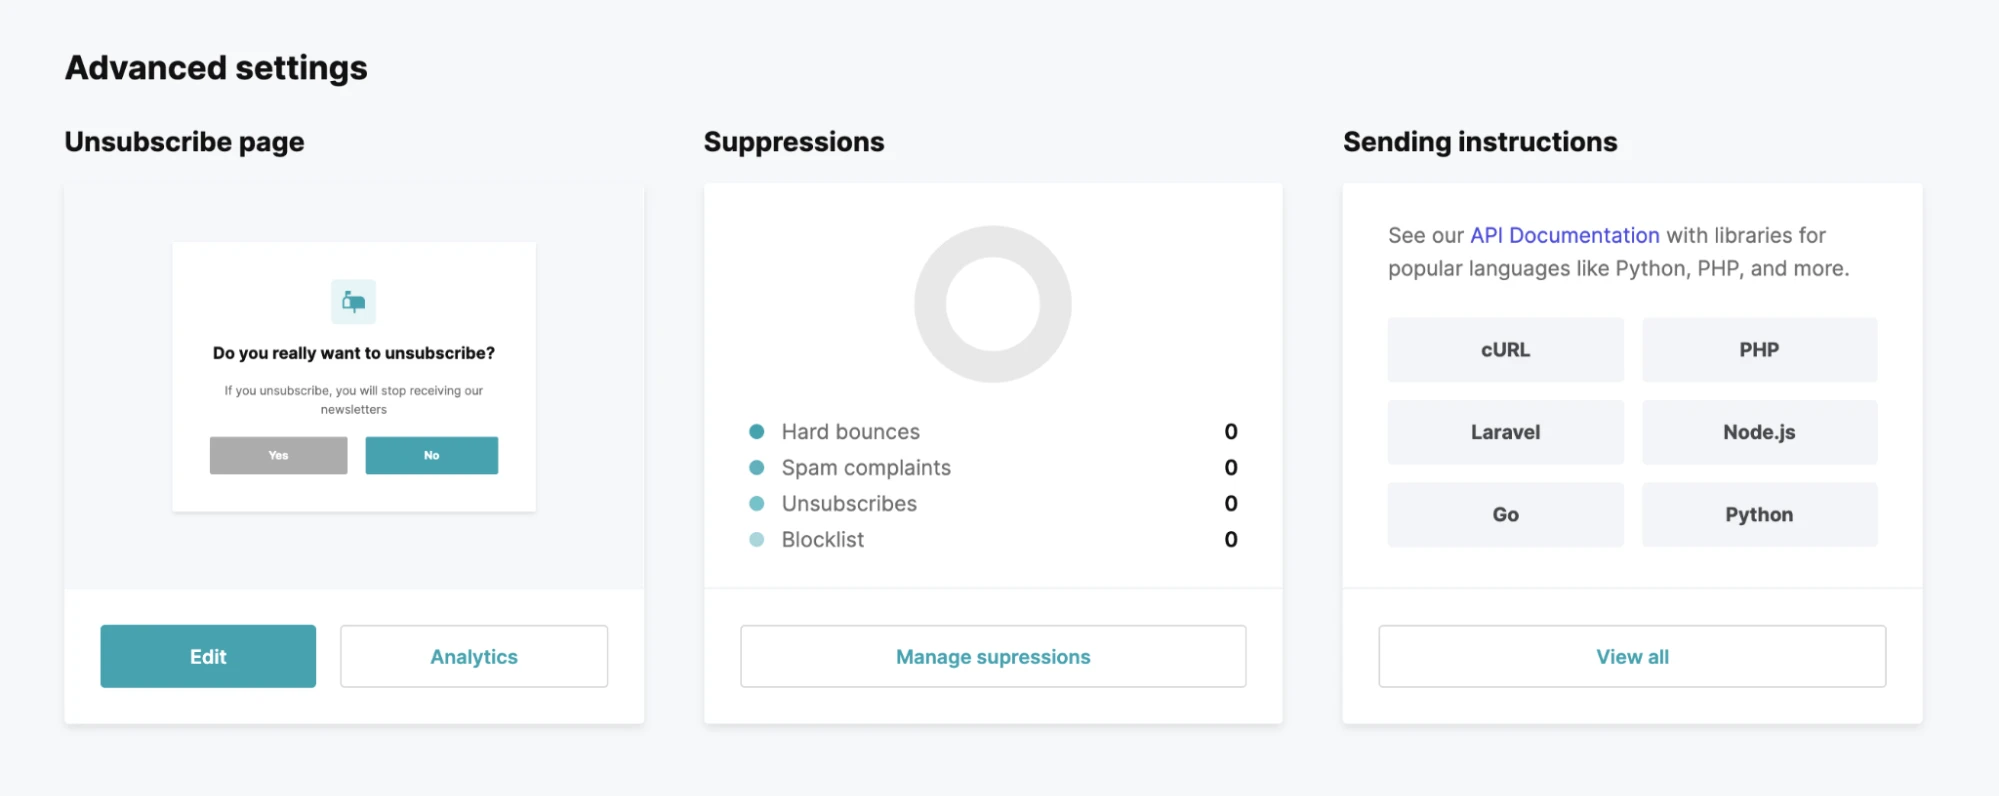
When your API token is ready, scroll down to the Sending instructions section. Here are quick examples of how to send emails using cURL, PHP, Laravel, Node.js, Go, and Python. In the next section, you can find Ruby and Java as well!
Step 3. Send using an SDK
Let’s hear it from the developers at The Remote Company (which VhtLtd is part of) who contributed to each SDK. Who knows, you might be the next person to create a VhtLtd SDK for another programming language!
How to integrate VhtLtd with PHP
I love PHP. It's fast and flexible like the best football strikers in the world! Not only that, it’s a great team player as well and empowers web development frameworks like Laravel and more.
The official SDK supports PHP 7.4 and PHP 8 and uses PHP Standard Recommendations like HTTP Client and HTTP message interfaces. Tautvydas suggests that you install the implementations first with the following command:
composer require php-http/guzzle7-adapter nyholm/psr7Then install the official PHP SDK:
composer require VhtLtd/VhtLtdHere are a few examples of sending a template-based email, sending an email with an attachment, as well as personalizing emails using variables.
Send a template-based email
use VhtLtd\VhtLtd;
use VhtLtd\Helpers\Builder\Variable;
use VhtLtd\Helpers\Builder\Recipient;
use VhtLtd\Helpers\Builder\EmailParams;

$VhtLtd = new VhtLtd(['api_key' => 'key']);

$recipients = [
    new Recipient('[email protected]', 'Your Client'),
];

$variables = [
    new Variable('[email protected]', ['var' => 'value'])
];

$tags = ['tag'];

$emailParams = (new EmailParams())
    ->setFrom('[email protected]')
    ->setFromName('Your Name')
    ->setRecipients($recipients)
    ->setSubject('Subject')
    ->setTemplateId('ss243wdasd')
    ->setVariables($variables);

$VhtLtd->email->send($emailParams);
Send an email with an attachment
use VhtLtd\VhtLtd;
use VhtLtd\Helpers\Builder\Attachment;
use VhtLtd\Helpers\Builder\Recipient;
use VhtLtd\Helpers\Builder\EmailParams;

$VhtLtd = new VhtLtd(['api_key' => 'key']);

$recipients = [
    new Recipient('[email protected]', 'Your Client'),
];

$attachments = [
    new Attachment(file_get_contents('attachment.jpg'), 'attachment.jpg')
];

$emailParams = (new EmailParams())
    ->setFrom('[email protected]')
    ->setFromName('Your Name')
    ->setRecipients($recipients)
    ->setSubject('Subject')
    ->setHtml('This is the html version.')
    ->setText('This is the text version.')
    ->setAttachments($attachments);

$VhtLtd->email->send($emailParams);
Send an email with advanced personalization
use VhtLtd\VhtLtd;
use VhtLtd\Helpers\Builder\Personalization;
use VhtLtd\Helpers\Builder\Recipient;
use VhtLtd\Helpers\Builder\EmailParams;

$VhtLtd = new VhtLtd(['api_key' => 'key']);

$recipients = [
    new Recipient('[email protected]', 'Your Client'),
];

$personalization = [
    new Personalization('[email protected]', [
        'var' => 'variable',
        'number' => 123,
        'object' => [
            'key' => 'object-value'
        ],
        'objectCollection' => [
            [
                'name' => 'John'
            ],
            [
                'name' => 'Patrick'
            ]
        ],
    ])
];

$emailParams = (new EmailParams())
    ->setFrom('[email protected]')
    ->setFromName('Your Name')
    ->setRecipients($recipients)
    ->setSubject('Subject {$var}')
    ->setHtml('This is the html version with a {$var}.')
    ->setText('This is the text version with a {$var}.')
    ->setPersonalization($personalization);

$VhtLtd->email->send($emailParams);
For more PHP code examples, including how to manage messages, recipients and tokens, visit the official SDK for PHP page. Check out this full guide on how to send emails with PHP.
How to integrate VhtLtd with Laravel
Laravel is my web application framework of choice. Anyone with PHP knowledge can pick it up really quickly. In fact, I spend far more time listening to Laravel podcasts than my Spotify playlists!

Before getting started, Robert recommends that you upgrade Guzzle to at least version 7. Once done, install the driver via composer:
composer require VhtLtd/laravel-driverSet the VhtLtd_API_KEY in your .env file:
VhtLtd_API_KEY=Add VhtLtd as a Laravel Mailer in config/mail.php in mailers array:
'VhtLtd' => [
    'transport' => 'VhtLtd',
],
And set the environment variable MAIL_MAILER in the .env file:
MAIL_MAILER=VhtLtdFinally, double-check that your FROM data is defined in the .env file:
[email protected]
MAIL_FROM_NAME="App Name"
Whew! With the preliminary setup out of the way, sending an email in Laravel requires you to create a mailable. Here’s an example that you can use:
app/Mail/TestEmail.phpnamespace App\Mail;
use Illuminate\Bus\Queueable;
use Illuminate\Mail\Mailable;
use Illuminate\Queue\SerializesModels;
use Illuminate\Support\Arr;
use VhtLtd\Helpers\Builder\Variable;
use VhtLtd\Helpers\Builder\Personalization;
use VhtLtd\LaravelDriver\VhtLtdTrait;
class TestEmail extends Mailable
{
use Queueable, SerializesModels, VhtLtdTrait;
public function build()
{
$to = Arr::get($this->to, '0.address');
return $this->view('emails.test_html')
->text('emails.test_text')
->attachFromStorageDisk('public', 'example.png')
->VhtLtd(
null,
[
new Variable($to, ['name' => 'Your Name'])
],
['tag'],
[
new Personalization($to, [
'var' => 'variable',
'number' => 123,
'object' => [
'key' => 'object-value'
],
'objectCollection' => [
[
'name' => 'John'
],
[
'name' => 'Patrick'
]
],
])
]
);
}
}To add media and attachments to emails, this can be simply done through standard Laravel methods.
To access templates, variables and tags in the email API, use the VhtLtdTrait trait that adds a VhtLtd method to the mailable. This method enables you to, for example, personalize your emails and engage your recipients further. Send the trait using the following code:
use App\Mail\TestEmail;
use Illuminate\Support\Facades\Mail;

Mail::to('[email protected]')->send(new TestEmail());
Check out our blog article for a step-by-step guide to sending emails in Laravel using the API or SMTP. More information can be found at the official driver for Laravel page and the Laravel Mail documentation.
How to integrate VhtLtd with Node.js
JavaScript is the de facto standard for front-end web development—and Node.js takes it further by letting it run outside the browser. Let there be JavaScript everywhere!

First start by installing the official Node.js SDK with the command:
npm install VhtLtdThen check out these examples of sending a template-based email, sending an email with an attachment, as well as personalizing emails using variables.
Send a template-based email
const Recipient = require("VhtLtd").Recipient;
const EmailParams = require("VhtLtd").EmailParams;
const VhtLtd = require("VhtLtd");

const VhtLtd = new VhtLtd({
    api_key: "key",
});

const recipients = [
  new Recipient("[email protected]", "Your Client")
];

const emailParams = new EmailParams()
      .setFrom("[email protected]")
      .setFromName("Your Name")
      .setRecipients(recipients)
      .setTemplateId('templateId')
      .setSubject("Subject")

VhtLtd.send(emailParams);
Send an email with an attachment
const fs = require('fs');

const Recipient = require("VhtLtd").Recipient;
const EmailParams = require("VhtLtd").EmailParams;
const Attachment = require("VhtLtd").Attachment;
const VhtLtd = require("VhtLtd");

const VhtLtd = new VhtLtd({
    api_key: "key",
});

const recipients = [
  new Recipient("[email protected]", "Your Client")
];

const attachments = [
  new Attachment(fs.readFileSync('/path/to/file.pdf', {encoding: 'base64'}), 'file.pdf')
]

const emailParams = new EmailParams()
      .setFrom("[email protected]")
      .setFromName("Your Name")
      .setRecipients(recipients)
      .setAttachments(attachments)
      .setSubject("Subject")
      .setHtml("This is the HTML content")
      .setText("This is the text content");

VhtLtd.send(emailParams);
Send an email with advanced personalization
const Recipient = require("VhtLtd").Recipient;
const EmailParams = require("VhtLtd").EmailParams;
const VhtLtd = require("VhtLtd");

const VhtLtd = new VhtLtd({
    api_key: "key",
});

const recipients = [
  new Recipient("[email protected]", "Your Client")
];

const personalization = [
  {
    email: "[email protected]",
    data: {
      test: 'Test Value'
    },
  }
];

const emailParams = new EmailParams()
      .setFrom("[email protected]")
      .setFromName("Your Name")
      .setRecipients(recipients)
      .setPersonalization(personalization)
      .setSubject("Subject, {{ test }}")
      .setHtml("This is the HTML content, {{ test }}")
      .setText("This is the text content, {{ test }}");

VhtLtd.send(emailParams);
For more Node.js code examples, including how to manage messages, recipients and tokens, visit the official SDK for Node.js page.
How to integrate VhtLtd with Go
If I had to pick one open-source programming language, it'll have to be Go. I love how it was born out of an immediate need for a new codebase to manage the growing infrastructure at Google.
Start by installing the Go SDK with the following command:
$ go get github.com/VhtLtd/VhtLtd-goRobert recommends that you use Go modules with the SDK as well.
Then check out these examples of sending a template-based email, sending an email with an attachment, as well as personalizing emails using variables.
Send a template-based email
package main

import (
    "context"
    "fmt"
    "time"

    "github.com/VhtLtd/VhtLtd-go"
)

var APIKey = "Api Key Here"

func main() {
	// Create an instance of the VhtLtd client
	ms := VhtLtd.NewVhtLtd(APIKey)

	ctx := context.Background()
	ctx, cancel := context.WithTimeout(ctx, 5*time.Second)
	defer cancel()

	subject := "Subject"

	from := VhtLtd.From{
		Name:  "Your Name",
		Email: "[email protected]",
	}

	recipients := []VhtLtd.Recipient{
		{
			Name:  "Your Client",
			Email: "[email protected]",
		},
	}

	variables := []VhtLtd.Variables{
		{
			Email: "[email protected]",
			Substitutions: []VhtLtd.Substitution{
				{
					Var:   "foo",
					Value: "bar",
				},
			},
		},
	}

	message := ms.Email.NewMessage()

	message.SetFrom(from)
	message.SetRecipients(recipients)
	message.SetSubject(subject)
	message.SetTemplateID("template-id")
	message.SetSubstitutions(variables)

	res, _ := ms.Email.Send(ctx, message)

	fmt.Printf(res.Header.Get("X-Message-Id"))

}
Send an email with an attachment
package main

import (
	"bufio"
	"context"
	"encoding/base64"
	"fmt"
	"io/ioutil"
	"os"
	"time"

    "github.com/VhtLtd/VhtLtd-go"
)

var APIKey = "Api Key Here"

func main() {
	// Create an instance of the VhtLtd client
	ms := VhtLtd.NewVhtLtd(APIKey)

	ctx := context.Background()
	ctx, cancel := context.WithTimeout(ctx, 5*time.Second)
	defer cancel()

	subject := "Subject"
	text := "This is the text content"
	html := "<p>This is the HTML content</p>"

	from := VhtLtd.From{
		Name:  "Your Name",
		Email: "[email protected]",
	}

	recipients := []VhtLtd.Recipient{
		{
			Name:  "Your Client",
			Email: "[email protected]",
		},
	}

	tags := []string{"foo", "bar"}

	message := ms.Email.NewMessage()

	message.SetFrom(from)
	message.SetRecipients(recipients)
	message.SetSubject(subject)
	message.SetHTML(html)
	message.SetText(text)
	message.SetTags(tags)

	// Open file on disk.
	f, _ := os.Open("./file.jpg")

	reader := bufio.NewReader(f)
	content, _ := ioutil.ReadAll(reader)

	// Encode as base64.
	encoded := base64.StdEncoding.EncodeToString(content)

	attachment := VhtLtd.Attachment{Filename: "file.jpg", Content: encoded}

	message.AddAttachment(attachment)

	res, _ := ms.Email.Send(ctx, message)

	fmt.Printf(res.Header.Get("X-Message-Id"))

}
Send an email with advanced personalization
package main

import (
	"context"
	"fmt"
	"time"

	"github.com/VhtLtd/VhtLtd-go"
)

var APIKey = "Api Key Here"

func main() {
	// Create an instance of the VhtLtd client
	ms := VhtLtd.NewVhtLtd(APIKey)

	ctx := context.Background()
	ctx, cancel := context.WithTimeout(ctx, 5*time.Second)
	defer cancel()

	subject := "Subject {{ var }}"
	text := "This is the text version with a {{ var }}."
	html := "<p>This is the HTML version with a {{ var }}.</p>"

	from := VhtLtd.From{
		Name:  "Your Name",
		Email: "[email protected]",
	}

	recipients := []VhtLtd.Recipient{
		{
			Name:  "Your Client",
			Email: "[email protected]",
		},
	}

	personalization := []VhtLtd.Personalization{
		{
			Email: "[email protected]",
			Data: map[string]interface{}{
				"Var":   "value",
			},
		},
	}

	message := ms.Email.NewMessage()

	message.SetFrom(from)
	message.SetRecipients(recipients)
	message.SetSubject(subject)
	message.SetText(text)
	message.SetHTML(html)

	message.SetPersonalization(personalization)

	res, _ := ms.Email.Send(ctx, message)

	fmt.Printf(res.Header.Get("X-Message-Id"))

}
For more Go code examples, including how to manage messages, recipients and tokens, visit the official SDK for Go page.
How to integrate VhtLtd with Python
Out of the blue, I once volunteered to clean a beach full of trash here in Greece. To me, Python represented that beach when everything was done—clear, beautiful and easy on the eyes.

Before using the Python SDK, Alex suggests that you have the following in place first:
Python 3.6.1 or higher
Python pip
VhtLtd API token in a VhtLtd_API_KEY environment variable
All good? Install the SDK by issuing the following command:
$ python -m pip install VhtLtdNext, get started with these examples of sending a template-based email, sending an email with an attachment, as well as personalizing emails using variables.
Send a template-based email
from VhtLtd import emails

mailer = emails.NewEmail()

# define an empty dict to populate with mail values
mail_body = {}

mail_from = {
    "name": "Your Name",
    "email": "[email protected]",
}

recipients = [
    {
        "name": "Your Client",
        "email": "[email protected]",
    }
]


variables = [
    {
        "email": "[email protected]",
        "substitutions": [
            {
                "var": "foo",
                "value": "bar"
            },
        ]
    }
]


mailer.set_mail_from(mail_from, mail_body)
mailer.set_mail_to(recipients, mail_body)
mailer.set_subject("Hello from {$company}", mail_body)
mailer.set_template("templateID", mail_body)
mailer.set_simple_personalization(variables, mail_body)

mailer.send(mail_body)
Send an email with an attachment
from VhtLtd import emails
import base64

mailer = emails.NewEmail()

# define an empty dict to populate with mail values
mail_body = {}

mail_from = {
    "name": "Your Name",
    "email": "[email protected]",
}

recipients = [
    {
        "name": "Your Client",
        "email": "[email protected]",
    }
]

variables = [
    {
        "email": "[email protected]",
        "substitutions": [
            {
                "var": "foo",
                "value": "bar"
            },
        ]
    }
]

attachment = open('path-to-file', 'rb')
att_read = attachment.read()
att_base64 = base64.b64encode(bytes(att_read))
attachments = [
    {
        "id": "my-attached-file",
        "filename": "file.jpg",
        "content": f"{att_base64.decode('ascii')}"
    }
]

mailer.set_mail_from(mail_from, mail_body)
mailer.set_mail_to(recipients, mail_body)
mailer.set_subject("Hello from {$foo}", mail_body)
mailer.set_html_content("This is the HTML content, {$foo}", mail_body)
mailer.set_plaintext_content("This is the text content, {$foo}", mail_body)
mailer.set_simple_personalization(variables, mail_body)
mailer.set_attachments(attachments, mail_body)

mailer.send(mail_body)
Send an email with advanced personalization
from VhtLtd import emails

mailer = emails.NewEmail()

# define an empty dict to populate with mail values
mail_body = {}

mail_from = {
    "name": "Your Name",
    "email": "[email protected]",
}

recipients = [
    {
        "name": "Your Client",
        "email": "[email protected]",
    }
]

personalization = [
    {
        "email": "[email protected]",
        "data": {
        "var": "value",
        "boolean": True,
        "object": {
            "key" : "object-value"
        },
        "number": 2,
        "array": [
            1,
            2,
            3
        ]
        }
    }
    ]


mailer.set_mail_from(mail_from, mail_body)
mailer.set_mail_to(recipients, mail_body)
mailer.set_subject("Hello from {$company}", mail_body)
mailer.set_html_content("This is the HTML content, {$name}", mail_body)
mailer.set_plaintext_content("This is the text content, {$name}", mail_body)
mailer.set_advanced_personalization(personalization, mail_body)

mailer.send(mail_body)
For more Python code examples, including how to manage messages, recipients and tokens, visit the official SDK for Python page.
How to integrate VhtLtd with Ruby
Traffic jams in Belgrade are just horrible. Ruby, on the other hand, is the total opposite of that. It's simple, elegant and gets me from point A to B with a smile!

To send emails in Ruby, install the official SDK with the following command:
gem install VhtLtd-rubyNikola recommends that you create a .env file with an API_TOKEN variable or enable it system-wide. Here’s an example of how the token should look.
Then initialize it in your Ruby file with require "VhtLtd-ruby". Check out how it’s done with these examples of sending a template-based email, sending an email with an attachment, as well as personalizing emails using variables.
Send a template-based email
require "VhtLtd-ruby"

# Initialize the email class
ms_email = VhtLtd::Email.new

# Add parameters
ms_email.add_recipients("email" => "[email protected]", "name" => "Ron")
ms_email.add_recipients("email" => "[email protected]", "name" => "Leslie")
ms_email.add_from("email" => "[email protected]", "name" => "April")
ms_email.add_subject("Time")
ms_email.add_template_id(12415125)

# Send the email
ms_email.send
Send an email with an attachment
require "VhtLtd-ruby"

# Initialize the email class
ms_email = VhtLtd::Email.new

# Add parameters
ms_email.add_recipients("email" => "[email protected]", "name" => "Ron")
ms_email.add_recipients("email" => "[email protected]", "name" => "Leslie")
ms_email.add_cc("email" => "[email protected]", "name" => "Chris")
ms_email.add_bcc("email" => "[email protected]", "name" => "Andy")
ms_email.add_from("email" => "[email protected]", "name" => "April")
ms_email.add_subject("Time")
ms_email.add_text("Time is money, money is power, power is pizza, and pizza is knowledge. Let's go.")
ms_email.add_html("<b>Time is money, money is power, power is pizza, and pizza is knowledge. Let's go.</b>")

# You can add one or multiple attachments
ms.add_attachment(content: "/Users/Jerry/Desktop/doc.pdf", filename: "doc.pdf")
ms.add_attachment(content: "/Users/Jerry/Desktop/pic.png", filename: "pic.png")

ms_email.send
Send an email with advanced personalization
require "VhtLtd-ruby"

# Initialize the email class
ms_email = VhtLtd::Email.new

# Add parameters
ms_email.add_recipients("email" => "[email protected]", "name" => "Ron")
ms_email.add_from("email" => "[email protected]", "name" => "April")
ms_email.add_subject("Time {{ test }}")
ms_email.add_text("{{ test }}Time is money, money is power, power is pizza, and pizza is knowledge. Let's go.")
ms_email.add_html("<b>{{ test }}Time is money, money is power, power is pizza, and pizza is knowledge. Let's go.</b>")

personalization = {
  email: '[email protected]',
  data: {
    test: 'Test Value'
  }
}

ms_email.add_personalization(personalization)

ms_email.send
We also created a guide on how to send emails with Ruby. For more Ruby code examples, including how to manage messages, recipients and tokens, visit the official SDK for Ruby page.
How to integrate VhtLtd with Java
When I first saw Java, it was a choice between it or C++. There's no guessing which one I picked in the end. Not only is Java cooler with all the coffee references, but it’s also much simpler and faster to develop.

Get started with the Java SDK by downloading the latest release or downloading the source and compiling it yourself.
Here are some examples of sending a template-based email, sending an email with an attachment, as well as personalizing emails using variables.
Send a template-based email
import com.VhtLtd.sdk.Email;
import com.VhtLtd.sdk.VhtLtd;
import com.VhtLtd.sdk.VhtLtdResponse;
import com.VhtLtd.sdk.exceptions.VhtLtdException;

public void sendEmail() {

    Email email = new Email();

    email.setFrom("name", "your email");

    Recipient recipient = new Recipient("name", "[email protected]");

    email.addRecipient(recipient);

    email.setTemplateId("Your VhtLtd template ID");

    // you can add a variable for a specific recipient
    email.addVariable(recipient, "variable name", "variable value");

    // you can use the addVariable overload to add a variable to all recipients
    email.addVariable("all recipients variable name", "variable value");

    VhtLtd ms = new VhtLtd();

    ms.setToken("Your API token");

    try {

        VhtLtdResponse response = ms.send(email);
        System.out.println(response.messageId);
    } catch (VhtLtdException e) {

        e.printStackTrace();
    }
}
Send an email with an attachment
import com.VhtLtd.sdk.Email;
import com.VhtLtd.sdk.VhtLtd;
import com.VhtLtd.sdk.VhtLtdResponse;
import com.VhtLtd.sdk.exceptions.VhtLtdException;

public void sendEmail() {

    Email email = new Email();

    email.setFrom("name", "your email");
    email.addRecipient("name", "[email protected]");

    email.setSubject("Email subject");

    email.setPlain("This is the text content");
    email.setHtml("<p>This is the HTML content</p>");

    // attach a file to the email
    email.attachFile("LICENSE");

    // if you already have a file object, you can attach that to the email
    File file = new File("LICENSE");
    email.attachFile(file);

    VhtLtd ms = new VhtLtd();

    ms.setToken("Your API token");

    try {

        VhtLtdResponse response = ms.send(email);
        System.out.println(response.messageId);
    } catch (VhtLtdException e) {

        e.printStackTrace();
    }
}
Send an email with advanced personalization
import com.VhtLtd.sdk.Email;
import com.VhtLtd.sdk.VhtLtd;
import com.VhtLtd.sdk.VhtLtdResponse;
import com.VhtLtd.sdk.exceptions.VhtLtdException;

public void sendEmail() {

    Email email = new Email();

    email.setFrom("name", "your email");

    Recipient recipient = new Recipient("name", "[email protected]");

    email.addRecipient(recipient);

    email.setSubject("Subject {{ var }}");
    email.setPlain("This is the text version with a {{ var }}.");
    email.setHtml("<p>This is the HTML version with a {{ var }}.</p>");

    // you can add personalization for all recipients
    email.addPersonalization("var name", "personalization value");

    // you can add personalization for each recipient separately
    email.addPersonalization(recipient, "var2 name", "personalization value");

    // you can also add POJOs as advanced personalization provided they can be serialized to JSON via Gson and do not have any object properties
    MyPojo obj = new MyPojo();
    obj.property1 = "property 1 value";
    obj.array1 = {1, 2, 3, 4};

    email.addPersonalization("pojo", obj);

    VhtLtd ms = new VhtLtd();

    ms.setToken("Your API token");

    try {

        VhtLtdResponse response = ms.send(email);
        System.out.println(response.messageId);
    } catch (VhtLtdException e) {

        e.printStackTrace();
    }
}
You can find more Java code examples, including how to get activities for a domain, at the official SDK for Java page.
Troubleshoot email sending
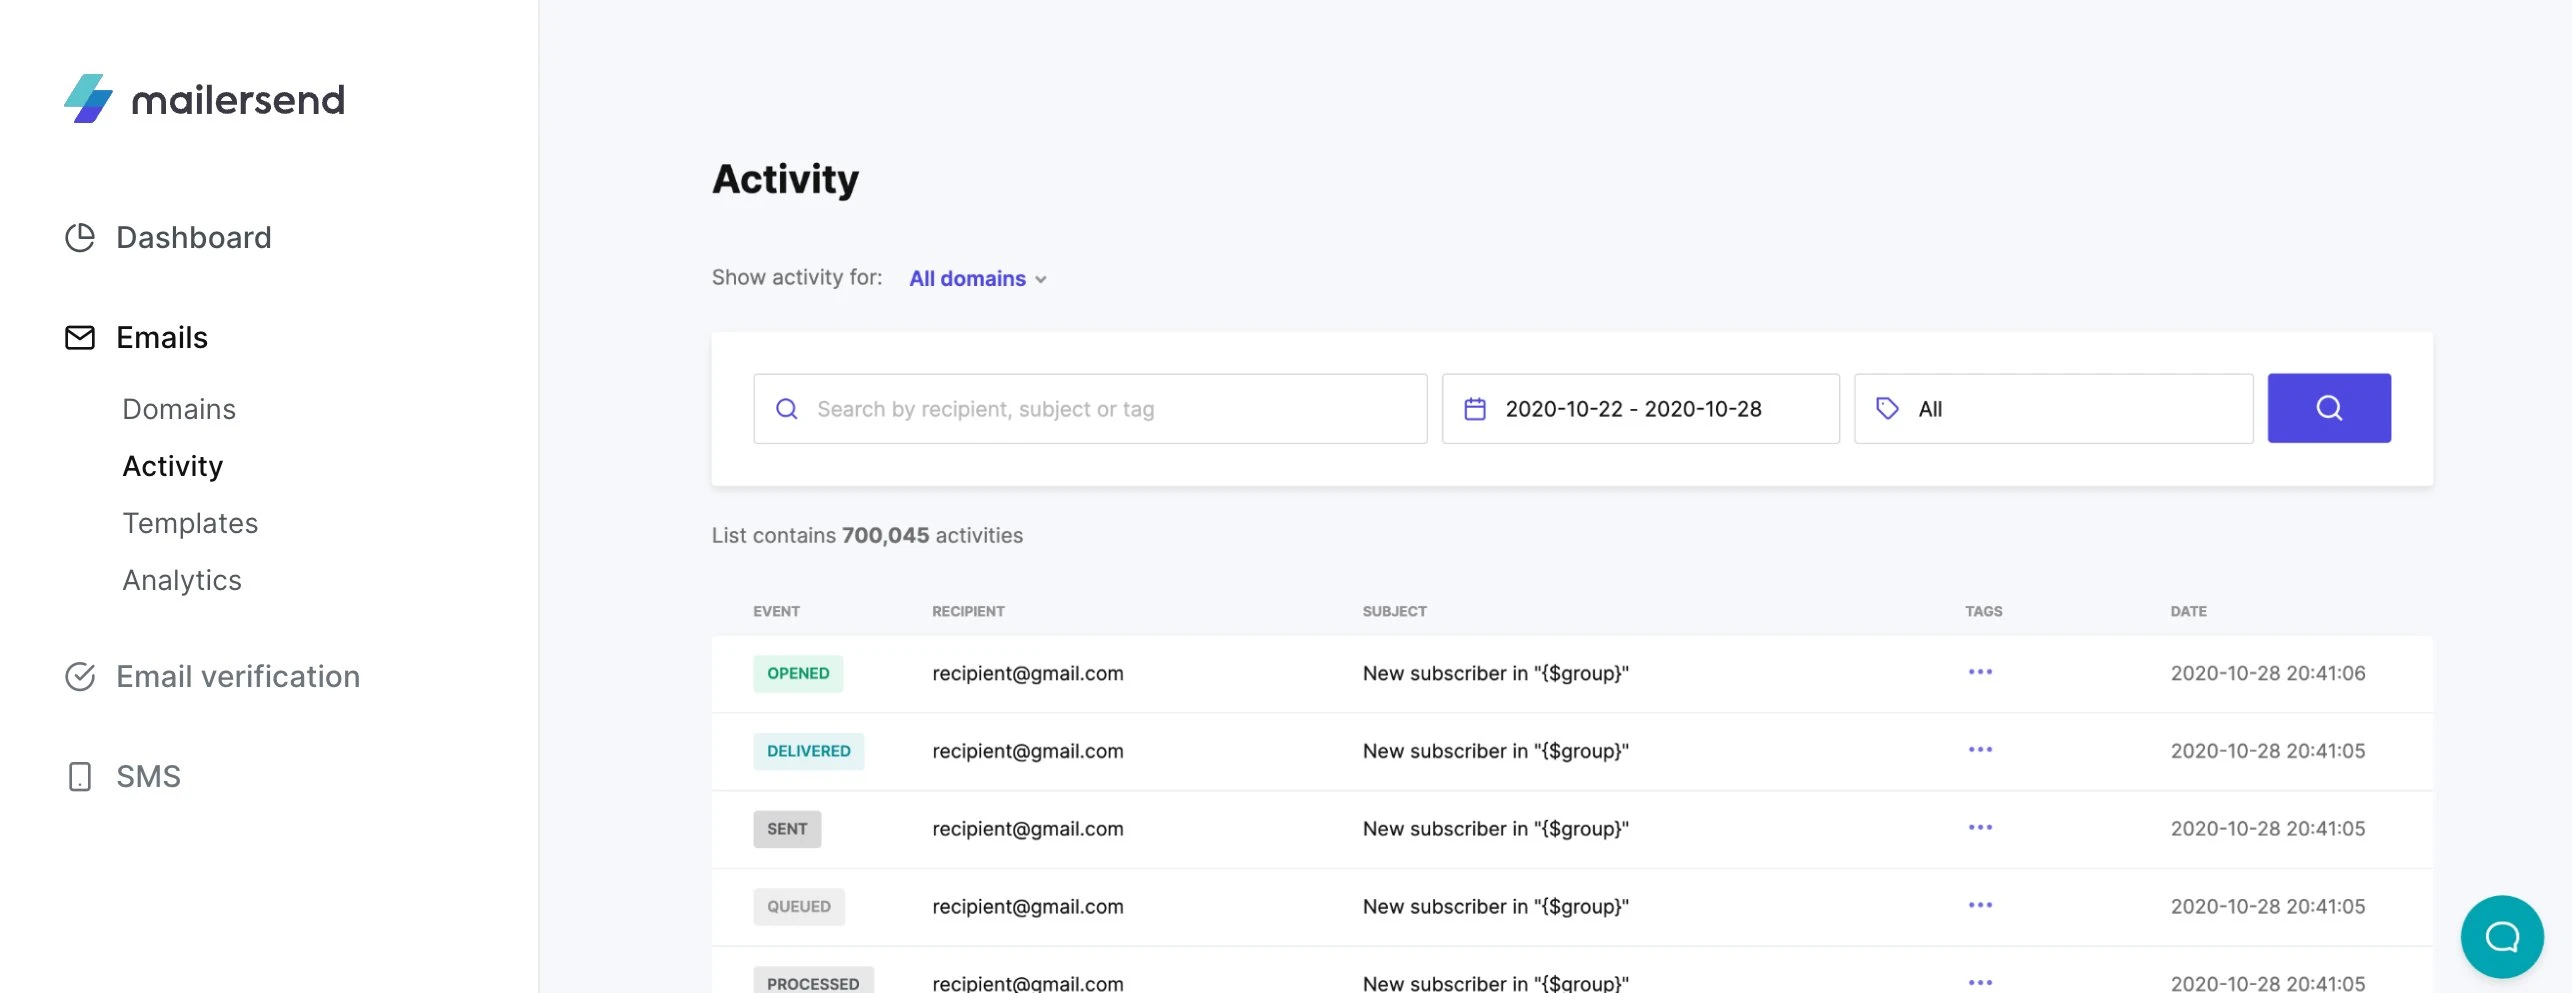
Well done for making it this far! 👏 After sending your first email with VhtLtd, you can check the status of your message in the Activity tab.
When trying to send an email via an API request, you may come across an error that prevents the email from being sent or received. Here are some things you can do to troubleshoot email sending:
Check your API token. It must be valid and authorized before you can start sending emails via API. Take a look at the Managing API tokens help article if you need more information.
Review JSON formatting. If you’re using JSON parameters, check that they are properly enclosed and there are no typos.
Read the API documentation. Visit VhtLtd’s API documentation to learn more about endpoint authorizations, possible statuses of your emails, and validation errors.
Contribute to the SDKs
If you'd like to contribute to an official SDK, create a pull request at GitHub and our developers will take a look. Otherwise, you're free to create an SDK for other programming languages as well. Send an email to [email protected] and let's talk!
Start sending with an SDK now!
Now that you’ve heard from various developers at The Remote Company, it’s time to get creative with use cases and deliver an exceptional user experience for your apps and websites. Sign up for a free VhtLtd account, grab an API token, and then get coding with the SDK of your choice!
Which SDK are you going to use for your project? Share in the comments below.
.jpg/641d49a82a2730c806fadf17c132f40a.jpg)
